Showing posts with label M4. Show all posts

Wednesday, 12 January 2011

Ass 207 - Task 1c - Portraiture selection

first selection

Intentions/purpose of the photography to be undertaken :-

For this photographic session I am going to take a series of portraiture shots of Lee in his work clothes, during this photographic shoot I will focusing on the head and shoulders, I might also try and incorporate some work props in to the session.

Reasons for selection of theme (including inspiration from the work of others) :-

I have been looking at the images of Ian Winstanley, he seems to be able to capture the personality of each individual sitter the use of strong lighting technique and good composition helps to create great portraiture shots time after time. I will be using his shots as an inspiration source to try and improve myself during this session.

The photo imaging equipment and medium that will be used and why :-

For this photo shoot I will be using my Canon 500D camera, 18-55mm lens, shutter release cable and a hot-shoe adapter linking the camera configuration to the studio lights, during the shoot I will use a single Barn Door light, by using the door reflectors panels I can control the direction of the light and how it falls acrosss the Lee, I will also use silver light reflectors to bounce light back at my sitter.

Techniques that will be used and how they will help convey the visual message :-

For this photographic session I will be moving the light source to alter the way in which the light falls across the sitters, I will also move the position of camera from time to time to try and capture different viewpoints and to see how this alters the image composition.

Once I had discussed and it had been agreed with the tutor we set-up a black Colorama background in the studio, I wanted to keep the background as dark as possible so black background was always going to be the choice. The photographic session lasted just over an hour and quite a lot of shots were taken during this time.

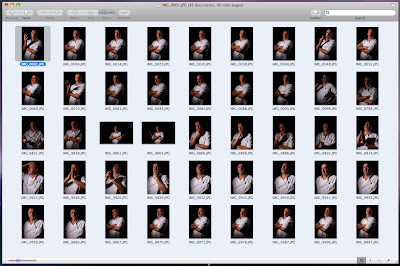
Once I had downloaded the images from my camera I was able to take a closer look at each individually shot, once I started the selection process I graded the images to help narrow down my choice to a selection of 45 images, the chosen images had to meet with the following requirements; good focus on the face, balanced lighting, good posture and composition, the selected images were imported into Lightroom where I was able to batch processed them. Once I had exported the images from Lightroom in to a new folder I reviewed the images once again and eventually made a selected of just 12, these 12 images were then opened in Photoshop ready for the next stage. 

The selected images were opened and copied acrosss into a new file which had a layer mask and picture keyline, each of the images were then reduced or enlarged to fit the picture area so that they would have a co-ordinated look and consistent size, once I was happy with each image I then individually applied some layer filters to help create the bleached look I was hoping for, the final part of the process was to save each image individually as a Hi-res and Low-res file ready for up loading to my blog.
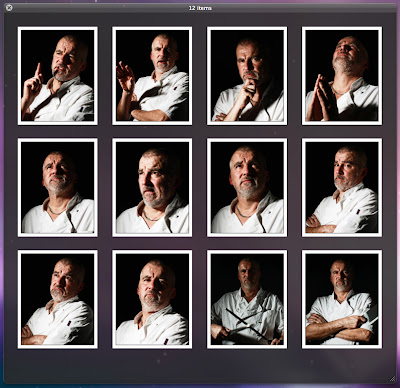
the chosen 12

Friday, 3 December 2010

Ass215 - digital image manipulation, part 5

image manipulation gallery


original image
processed image


masks and cropping

overlay, mask and crop

original processed image
greyscale manipulation
colour tints
tints and masks
retro, jumpers for goalposts


mask, layers and cropping

Ass215 - digital image manipulation, part 4

Saving images and file formats


The final part of the process is to save the work, there are many formats available within Photoshop, each format has a different use depending on the end use of the image, for this project I have used the JPEG format, it provides a file format that works well and is supported on the web and in digital print.


.JPEG (Joint Photographic Experts Group), is a widely used method of compression for digital images, the amount of compression can be adjusted, allowing for a controlled trade-off between storage file size and image quality. This format is used in the graphics, publishing, and web industries, where the requirement to control and distribute images over the internet without loosing too much perceptible quality is essential for the end user, either for traditional print requirement or to be viewed on computer screen.

The JPEG is also the most common file format used in todays creative industries and by the amateur photographer, images are saved within the digital camera. Internal settings allow the photographer to choose image output quality, large JPEG files for publishing or small JPEG options for viewing on computer or even in a digital frame.


Other file formats that might be used in the production process:


.PSD (Photoshop Document), saves an image with layers, layer-masks, clipping paths, transparency, text and many more settings, this allows the operator to re-open the saved document at any time to make changes. This file format can also be exported to and from other Adobe software products such as Illustrator, Premiere Pro, and After Effects.

.TIFF (Tagged Image File Format), is a file format used for storing image data and is widely used in the graphics, photographic, publishing industries due to its ability to handle image data within a single file source, this format is slowly being replaced with JPEG as the industries preferred format choice.

.PNG (Portable Network Graphics), is a bitmapped image format that employs lossless data compression and was designed for image transfer on the web, this file format was not designed for use in traditional print.

Wednesday, 20 October 2010

Ass 207 - Task 1b - Advertising concept photo shoot

Once the idea had been approved, the first part of my assignment would be to secure clothing props for the shoot, I was able to secure the clothing with help of local amateur cricketers, 2 pint glasses were borrowed from a local pub and for the final prop I made the discission to use larger beer instead of a darker bitter, I felt that a lighter coloured beer in the glass would give a cleaner brighter look, unlike a traditional brown bitter.

For the shoot I used 2 lights to lighten the background, the background might be removed at a later date to allow for either landscape or portrait use. This way of working would provide a flexibility of image use later on. A single light was used to light up the model, the position of the light was to the front and slightly off to the models right.

The type of pose and the creative idea were discussed with the model and provided an understanding about what type of image I hoped to capture, we also discussed how the session might unfold as we worked together during the shoot. A few test shots were taken to make sure that the position of the lights and camera were okay, I also looked and tested both of my lenses (Canon 50mm lens and a Canon 18-55mm lens) after looking at the test shots I decided to use the 18-55mm lens for the rest of the shoot, I felt that this lens gave me the most flexibility for the shoot. To get the shot I was looking for I positioned the camera at a high position on the studio tripod, slightly above eye level, because of the angle and position of the camera I needed to use a step-ladder, before ladder use I made sure that all safety protocol and procedure was followed.

During the photo session I took just under 100 images, once I had downloaded the images from my camera I was able to take a look at all the images and started a selection process of the images which I felt met with the following requirements; good focus on the face, balanced lighting, good posture, and hopefully a range of characturers.


From the 100 images I made a selection of just 19 images which i felt encapsulated the above criteria, I imported the selected images into Lightroom to take a closer look at the individual images and if I felt that there was a need I could make changes to the colour balance of each of the images, once I was happy i exported them to a new folder on my desktop. These images would be reduced further to only 10 images, then finally I would make a final selection which would then be used and incorporated into the advertising poster.
9 of the best

Making the final selection I wanted to eliminate the weaker shots and those shots that appeared very similar in both stance and facial expression.
My final choice for the prefered image to be used in the poster was the umpire_ 6. I felt that this image had a good posture balance, and great facial expression.

owzthat...